blog feed

Buffalo Chicken Bierocks

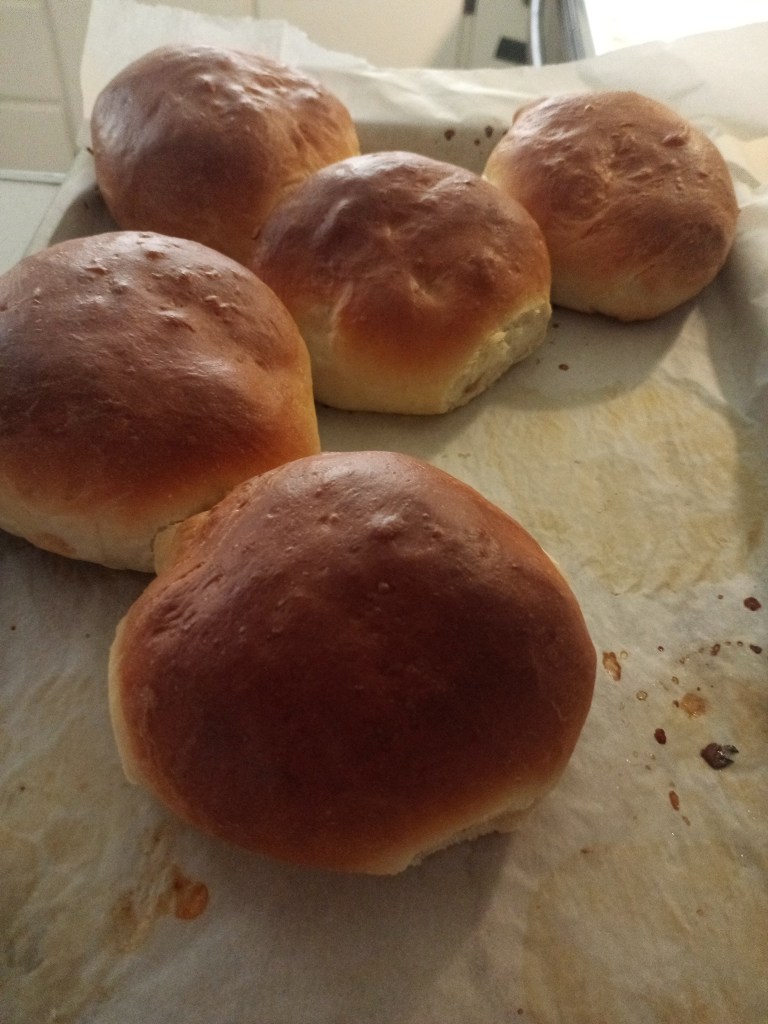
On our trip through Germany on our culinary trek we found a recipe I’m quite fond of. I had never heard of Bierocks before this. It’s a fully contained sandwich that fits perfectly in a lunch box for adults or children. You don’t have to fill them with the spicy blue cheese chicken mixture. You could adapt them to be ham and cheese or cheese and tomato sauce with a little cubed pepperoni.

The traditional filling for these is ground beef and cabbage. I didn’t fill them this way mostly because my family doesn’t eat a lot of cabbage, but if yours does then going traditional might be a good option for you.

Soft pillowy bread

Ingredients

  • 1 cup warm milk
  • 1/4 cup white sugar
  • 1 packet of active dry yeast
  • 4 cups of all purpose flour
  • 2 tbsp. cool melted butter
  • 1 egg, beaten
  • 3/4 tsp. salt
  • 1 can chicken
  • 3 tbsp. hot sauce (franks red hot)
  • 1/4 cup blue cheese crumbles
  • salt and pepper to taste
  • 2 tbsp. milk for brushing dough

Directions

  1. Add warmed milk and sugar into the bowl of a mixer with a dough hook and mix until sugar dissolves. Add yeast and mix together. Wait till it starts to foam.
  2. Add 2 cups flour and mix to combine.
  3. Add butter, eggs and salt and mix.
  4. Add remaining 2 cups of flour about a 1/4 cup at a time until dough comes together.
  5. Knead dough either in the machine or by hand for about 10 minutes until a soft dough forms. You want in to spring back quickly when you poke it.
  6. Put dough in a greased mixing bowl and cover with a towel. Let rise for 45 minutes.
  7. In the last ten minutes or so of your first dough proof mix your filling together. Season to taste and set aside.
  8. Turn dough out onto a floured surface and knock the air out. Divide into 8 equal pieces. Flatten it in the palm of your hand into about a 4 inch circle. Place 2 tbsp. of filling and roll into a bun shape. Continue until filling is gone.
  9. Let these rise for 45 minutes.
  10. During the last few minutes of this rise preheat oven to 375 degrees and brush bierocks with milk.
  11. Bake for 25 minutes until golden brown.

Zuppa Toscana

I decided to try this soup because I don’t have many soups in my repertoire and I really needed something to eat with my foccacia that I had made the same day. Soup I have discovered is all about layering and this one definitely packs a flavor punch.

This soup from what I have seen is normally made with kale, but I didn’t have any so I used the spinach in my fridge and it still turned out amazing.

Ingredients

  • 1 pound ground sausage
  • 1 onion, chopped
  • 6 cups chicken stock
  • 4 large Russet Potatoes
  • 3 cloves garlic, minced
  • 1 shallot, diced
  • 4 slices bacon, chopped
  • 1 cup spinach
  • 3/4 cup heavy cream
  • salt/pepper
  • parmesan cheese, for sprinkling on top

Directions

  1. In a large stock pot on medium high heat cook your sausage. For roughly 5-6 minutes until its browned all over. Take it out and put it in a separate bowl.
  2. Put butter, onion and shallot into pot and cook until your onions get some color on them. About 4 minutes or so. Add the garlic and cook for another minute.
  3. Add chicken broth, potatoes and salt/pepper. Cook for about ten minutes until potatoes are tender. This will vary depending on how small you dice your potato.
  4. Stir in heavy cream, spinach and sausage. Cook for a couple of minutes until spinach wilts a little.
  5. Serve with parmesan sprinkled on top.
  6. Optional: serve with rosemary parmesan foccacia https://bottomlesschips.food.blog/2020/04/28/rosemary-parmesan-foccacia/

Rosemary Parmesan Foccacia

The smell of rosemary and garlic fills my house every time I bake this. The olive oil on top creates a moist garlic bread taste without all the shattering crumbs of a crusty french bread. I used cheap Walmart extra virgin olive oil and it tastes delicious. If you have a fancy olive oil try it out on this recipe. See what kind of flavor it brings to the bread.

Garlicky and Cheesy

Ingredients

  • 1 1/3 cup warm water
  • 3 1/2 cups all-purpose flour
  • 2 tsp. honey
  • 1 pack active dry yeast
  • 1/4 cup olive oil
  • 2 tsp. kosher salt
  • 2 sprigs rosemary
  • 2 Tbsp. parmesan cheese
  • 1 clove garlic, minced
  • olive oil for drizzling

Directions

  1. Add your water, honey and yeast into the bowl of a stand mixer and whisk to combine. Let sit for a couple of minutes to let the mixture get frothy.
  2. Gradually add your flour, oil and salt and mix for five minutes. The dough should be fairly smooth.
  3. Grease either this mixing bowl or a new one with oil and cover the dough. Let rise for 60-90 minutes.
  4. Turn the dough out onto a floured surface and roll it out into a rectangle shape. Place it on a parchment lined baking sheet and cover it with a tea towel. Let it rise for about 20 minutes.
  5. Use your fingers and poke holes all over the dough. Go all the way to the baking sheet!
  6. Sprinkle garlic, olive oil, rosemary, cheese, and salt all over the top of the bread. The holes you’ve poked will catch all the oil.
  7. Bake at 400 degrees for 20 minutes.
  8. Resist the urge to eat it all.

Pork Schnitzel and Chonky Potato Salad

Crispy Cronchy Amazing

As an attempt to continue our trip through German food we have found our way to pork schnitzel. I had never fried anything in Panko before so when this worked out for me on the first try I was pleasantly surprised how easy it was. The potato salad is also my new favorite way to eat potatoes. The sour cream gives the potato salad a lightness that is pleasantly different from the over dressed packaged ones in the deli section of the store.

Ingredients

Pork Schnitzel

  • 4 boneless pork chops, pounded to about a 1/4 inch thickness
  • 1 cup flour
  • 1 cup panko bread crumb
  • 1 egg
  • 1 tbsp. dijon mustard
  • salt/pepper
  • 1/2 tsp onion powder
  • 1/2 tsp. garlic powder
  • neutral oil for frying

Potato Salad

  • 8 red potatoes, chunky dice
  • 1/2 cup sour cream
  • 1 clove grated garlic
  • 1 tsp. fresh chopped dill
  • kosher salt/pepper to taste

Directions

  1. Set up your bread station: flour and seasonings in one bowl. Egg and dijon mustard in another. Bread crumbs in the third bowl.
  2. Pound out your pork chops and place them on a plate. Set aside.
  3. Chop potatoes and place them in a pot of salted boiling water. These will take about 10 minutes depending on how chunky you cut them.
  4. Put sour cream, dill, garlic and salt into a medium size bowl and set aside.
  5. When potatoes only have a couple minutes left you want to put a pan on medium heat and put about 2 tbsp. oil in.
  6. Start breading your pork: First put it in the flour. Make sure both sides are coated. Then dip into the egg and mustard mixture. Let the excess drip off. Then coat in bread crumb. Make sure both sides are evenly coated.
  7. By this time your potatoes should be done. Drain the water and put in bowl with sour cream. Mix together and set aside.
  8. Fry up your pork. You can put two in a pan together cooking them about 2 1/2 to 3 minutes on each side. You want your pork to be slightly pink and glistening inside. If its grey you have gone to far. You have shoe leather now.
  9. Lightly salt the schnitzel once its done frying and serve it up next to your potato salad.

Smashed Chickpea Salad

Briny and Bright

I had never had a chickpea salad in my life till a couple of weeks ago. Now I keep at least two cans in my pantry cupboard for emergencies. Like I’m super lazy and I need something that is going to be light and filling at the same time. It’s a magic salad actually.

Ingredients

  • 1 can chickpeas, rinsed and drained
  • 1/4 red onion, diced
  • 3 dill pickles, diced
  • 1 clove garlic, grated
  • 1/2 cup mayo
  • 1 tbsp. pickle juice
  • kosher salt and pepper to taste

Directions

  1. Drain and rinse your can of chickpeas. Place in small mixing bowl. Using a fork mash the chickpeas leaving some of them still whole.
  2. Add onion, pickle and pickle juice and stir.
  3. Add mayo, garlic and salt/pepper and stir to combine.
  4. Optional: Lemon juice to add more acid.
  5. Optional: Celery to add more cronch.
  6. Optional: Tahini/more mayo to add more creaminess.
  7. Optional: Chili flake to add some heat.

This recipe is something I learned from one of the food editors of the basically column from Bon Appetit. It’s magic because the recipe could be adapted to what you have. This is the recipe that I used and It was delicious. Serve it in a wrap or on a sandwich. You could also just eat it straight out of the bowl with a spoon.

White Chocolate Macadamia Nut Cookie

Chewy and Delicious

Best cookies ever says my husband who doesn’t eat cookies. This was the first time I made a thin chewy cookie instead of a cakey cookie, and it just so happens to be my favorite cookie flavor so I was doubley happy for the win on this one.

Ingredients

  • 1 3/4 cup flour
  • 3/4 cup granulated sugar
  • 3/4 cup brown sugar
  • 1 stick of butter
  • 2 eggs
  • 1/2 tsp. kosher salt
  • 1 tsp. vanilla
  • 1/2 tsp. baking powder
  • 1 cup white chocolate chips
  • 1 cup macadamia nuts

Directions

  1. In the bowl of a stand mixer cream the butter, sugar, eggs and vanilla together.
  2. In a separate medium sized mixing bowl mix all your dry ingredients together to combine.
  3. Slowly combine the dry ingredients with the wet until well mixed.
  4. Remove the bowl from the mixer and fold in your chocolate and nuts.
  5. Wrap bowl in plastic wrap and chill for two hours.
  6. Preheat the oven to 350 degrees. Line two baking sheets with parchment and using an ice cream scoop drop cookies about an inch apart on the sheets.
  7. Bake for about 9 minutes until the edges are slightly browned.
  8. Let cool for a couple minutes on the baking sheet then move to a cooling rack.
  9. Either repeat the process with the leftover dough or freeze it to enjoy later.

Potato Bacon Soup and Dinner Rolls

In our quest to explore the world of food through the origin of Disney stories we have found our way to germany next. The world of snow white, tangled and sleeping beauty. From what I have noticed of German food it is made of easily attainable ingredients and warm spices that fill the home and the bellies of the people that live there with happiness. This bacon potato soup and hot roll combo is my interpretation of snow white feeding supper to the dwarves.

Tip: you will need to start your hot rolls about two hours before you start your soup. Your rolls and soup take the same amount of time to cook so you want to get all the proofing and dough forming out of the way.

warm soup and fresh bread can’t be beat

Ingredients

Soup

  • 6 slices of bacon, chopped
  • bacon grease/butter
  • 1 shallot, diced
  • 4 garlic cloves, minced
  • 1/4 cup flour
  • 2 cups chicken stock
  • 2 cups milk
  • 8 red potatoes, thick dice
  • 1 cup shredded cheddar cheese
  • 1/2 cup sour cream
  • 1 tsp. salt
  • 1/2 tsp. pepper

Bread

  • 2 tsp yeast (active dry)
  • 3/4 cup water (warm, 95 to 110 degrees F)
  • 2 Tbsp honey
  • 1 tsp salt
  • 2 Tbsp butter, softened
  • 1 egg
  • 2 1/2 cups bread flour

Directions

Soup

  1. Dice your bacon into small chunks and place in a large pot. Cook on medium high until crispy then remove the bacon and set aside. Leave the bacon grease in the pot.
  2. Turn the heat down to about medium low and add a tablespoon of butter.
  3. Add you shallot and garlic and cook for about 4 minutes until your shallots have some color on them.
  4. Add your flour and stir continuously for about a minute until fully combined.
  5. Add stock, milk and potatoes. Cook for about 15-20 minutes until potatoes are cooked through.
  6. Add cheese, sour cream and bacon and cook until cheese is melted.

Bread

  1. In the bowl of a stand mixer with a dough hook attachment (You can also just do this in a medium bowl) add your yeast and water. Stir until the yeast dissolves.
  2. Stir in the honey, salt, butter and egg. Add the flour and mix well. You want the dough to stick to the hook. If your mixing in a bowl you want the dough to follow the spoon around the bowl.
  3. Turn the dough out onto a floured surface and knead for about 8 minutes. You want the dough to be smooth and elastic. If you poke it you want it to spring back slowly.
  4. Place the dough in a clean oiled bowl and cover with plastic wrap. Let rise for one hour till it doubles in size.
  5. Punch dough down to knock the air out of it. Turn it back out onto your floured surface and knead for about five minutes.
  6. Divide dough into about ten equal pieces. Take each piece and roll it into a ball. Tucking the edges in underneath the dough to make a nice round surface. Place in a round greased pan and over with a clean kitchen towel for about 45 minutes. Don’t let them rise too high or they will be hard to turn out once you cook them. (Speaking from experience)
  7. Bake in a 375 degree over for about 20 minutes. Till the tops are golden brown. Turn them out onto a rack to cool.

If you do manage to let them rise a little long I ended up having to use a paring knife to cut them out. They were still warm and delicious. Just not nice and round.

Spicy Dill Pickles

Spicy and delicious

Due to the nature of this quarantine there has definitely been a shortage of shelf stable ingredients. So here in the bottomless chips home kitchen we are looking into learning how to make all those delicious bits and bobs that we depend on. I think we might call this segment…”What’s In That Jar?” That sounds good to me.

Ingredients

This makes two pint sized jars worth of pickles

  • 4 cloves garlic, smashed
  • 4 jalapenos
  • 4 mini cucumbers
  • 2 tsp. dill seed
  • 2 tsp. chili flake
  • 1 cup water
  • 1 cup distilled vinegar
  • 2 tsp. kosher salt

Directions

  • Wash and sanitize your new jars before putting your delicious pickles in them.
  • Place one tsp each of dill seed and chili flake in your jars.
  • Peel and smash your garlic cloves and place two in each jar.
  • cut the stem off your jalapenos and put two in each jar.
  • Cut your cucumbers into thick chips and put two cucumbers worth of chips in each jar.
  • Put the water, vinegar and salt in a small pot and bring to a boil. Dump gently over pickles until jar is almost full of liquid.
  • Seal your jars and place in the fridge for 7 days.
  • Eat delicious pickles!

These are really spicy which is what I wanted. You can either tone down the chili flake or omit it all together if you want.

I Think I Like It Now: Tartar Sauce Edition

I’m not normally a picky eater. I’ll try anything once. Sometimes that means that the one time you do try it you have a bad time. This was me and tartar sauce. I couldn’t tell you where I had said sauce because it was so long ago, but it was such an offending experience I never had it again. This also meant I haven’t had a fish sandwich since that traumatic day either. Sad…I know. So now as I am expanding my culinary horizons I figured I would try to make it myself. My husband is a lover of the stuff and the other night he asked for fish sticks and chips. So there was my opportunity for culinary redemption. Here’s what I came up with…

Ingredients

  • 1/2 cup mayo
  • 3 dill pickles, diced
  • 1/2 white onion, diced
  • 1 clove garlic, grated
  • 2 tsp. pickle juice
  • 1/2 tsp. black pepper
  • 1/2 tsp. salt

Directions

Mix it all together in a small bowl. Add more salt or pepper to taste if you need to. Dip all the things in it.

Surprise Chili

Sometimes we walk into the kitchen and just stare into the fridge hoping food will just make itself. Especially in times like this when we are trying to use every speck of food in our house it’s rough coming up with new dinner ideas. When I walked into my kitchen the other day I pulled a few things out of the fridge and a couple things out of the cupboard and just slowly started putting things in a pot. Turned out somewhere half way through I realized I was making chili….Surprise!

Ingredients

  • 1/2 pound ground beef
  • 4 mini sweet peppers, diced
  • 1/2 red onion, diced
  • 3 garlic cloves, minced
  • 1 cup beef stock
  • 1 can tomato sauce
  • 1 can diced tomato
  • 1 can white beans
  • 1 can pinto beans
  • salt/pepper/chili powder

Directions

  1. Put beef into pot and break into large chunks. Cook undisturbed for about five minutes.
  2. Add onion, pepper and garlic and break up meat into smaller chunks. Cook for another five minutes until your onion and peppers have color on them.
  3. Add your beef stock to deglaze the pan and cook for about two minutes. Add your tomato sauce and canned tomato. Stir to combine and cook for about five minutes.
  4. Add your cans of beans and season to taste. Cook on a low heat for about ten minutes to allow flavors to combine.

Serve with sour cream, shredded cheese, chives or whatever you would normally top your chili with.